Workflow is a feature that enables the automation of processes either fully or partially, where activities are transferred from one participant to another, so that actions can be taken according to a set of rules and procedures, enhancing them through two intrinsic components: technology and organization.
With workflow, it is possible to define the order of execution through the conditions under which each task is started. A task can be performed by one or more agents, or by a combination of them.
How to enable workflow
By default, this feature is disabled in your Movidesk. To take advantage of all the benefits that workflow can offer, go to the "Settings" menu and under the "People" item, select "Access Profiles". Choose and access the profile to which you want to allow creating workflow rules, and in the "Settings" tab, use the scroll bar to navigate to the "Allow registering work sequences" parameter. Enable the switch and then save the changes.
ATTENTION: If this parameter is checked, the agent will be able to access the screen for registering work sequences. It is recommended that only administrators have access to this option, as it will allow defining the execution sequence of tickets.
After saving the changes, press F5 and a new item for registering workflows will be displayed in the settings menu.
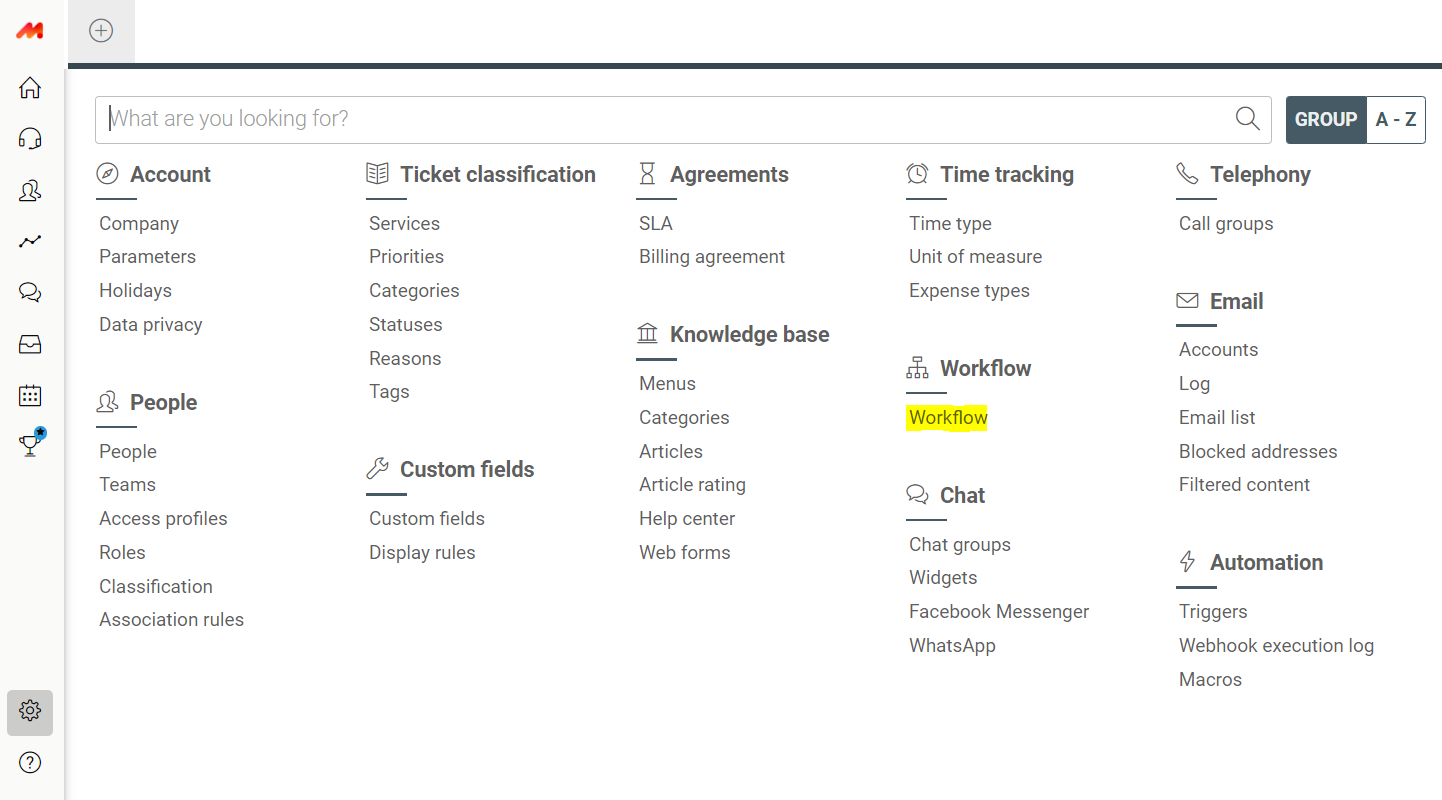
How to configure a workflow
Having enabled the workflow module in the access profile, go to the new "Workflow" item displayed in the settings menu. You can create one or more work sequences from a very simple and quick procedure. First, click on the "+" icon to start creating a new workflow.
The system will open a screen for registering a new workflow. In the "main" tab, define a name for the new rule.
After defining a name, proceed to the "conditions" tab and define criteria for executing this workflow. If you prefer this workflow to be a standard for all tickets, you can also leave the conditions blank, as they are not mandatory fields. Configuring the conditions is similar to that used in triggers, but without the need for a trigger criteria validator.
Once the conditions for the workflow application are set, in the "managers" tab define who will have management privileges over this rule. Essentially, the manager will be able to resolve or cancel a ticket at any time, as well as advance or regress tickets to any stage; however, defining a manager is not mandatory. Non-manager agents only have permission to advance the ticket to the next stage or return it to the previous stage.
Finally (but not least), use the "execution sequence" tab to define which and how many stages this workflow will have, to whom they will be assigned (which can be agents or teams), and at what point the flow can be resolved or canceled. Once the rule is created, you can still redefine the order of the work sequence through the icon 
After defining the execution sequence, just click on and the configurations made will be successfully saved and will already be active in the system.
Use the options box to clone, disable, enable, delete, and/or export the information to Microsoft Excel directly from the workflow grid.
Workflow in tickets
Whenever the conditions for executing a particular workflow are met in a ticket, the system will display a stage indicator, which will show the stage the ticket is in and allow moving the ticket to the next stage or back to the previous one (or if you are a manager, moving it to any stage). If the responsible party defined by the sequence is a team, the responsible combo will be enabled, with all agents from that team, allowing the ticket to be assigned to any agent of the team or even to the team itself. If the responsible party is an agent, the combo will be disabled, with the selected agent.
At the same time, the ticket history will indicate that a workflow has been started. Similarly, whenever the ticket reaches the final point, the history will show that the workflow has been completed (this also happens when a workflow is deleted or disabled).
NOTE: This information is not visible to customers.
Information about the workflow is also available in the ticket details, on the main tab.
As well as among the information present in the ticket printout.
Workflow in the ticket grid
You don't need to access a ticket to know which stage of the workflow it is in. Adjust your ticket view grids to add informative columns about the workflow. Access the desired view through the ticket grid by selecting "Change views...". Choose the panel and view you want to modify and click on the icon "+", or drag the options as desired to the list of selected columns in the order you prefer.
Save the changes and refresh the ticket grid for the changes to be displayed.
You can also use the workflow as a criterion for triggers, access policies and SLA rules if desired.