In this article, you will learn how to configure and track article ratings in the knowledge base.
Article rating
To enable article rating, you must go to Settings > Knowledge Base > Article rating. In the article rating tab, enable the use the article rating module parameter.
Below this parameter, there are three response model options for article rating: positive and negative (satisfied or dissatisfied), smiling faces (5 levels of satisfaction), and NPS (score from 0 to 10).
You should also choose the message for article rating. You can opt for one of the four predefined options or create your own message by selecting the "other" option.

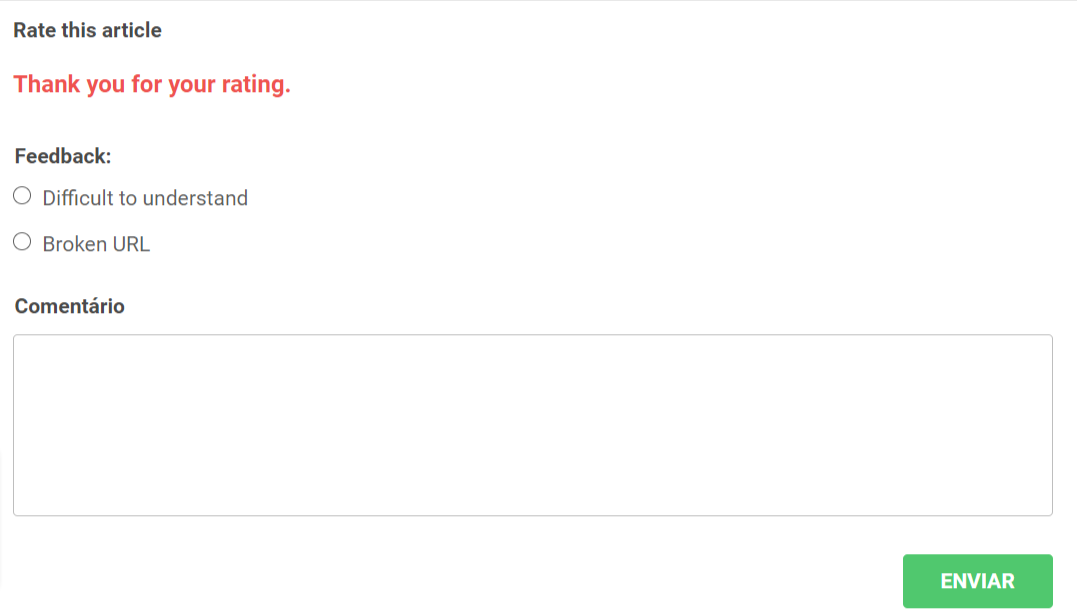
Structured Feedback
Structured feedback allows the user to choose from one of the justification options for their rating. These alternatives will be displayed in cases of negative feedback, simplifying the organization of necessary improvements.
In the smiling faces and NPS models, you can select which range of ratings will display the justification options for the user's feedback. This can be done in Settings > Knowledge Base > Article Settings. Select the response model with smiling faces or the NPS model and define the condition for article feedback.
In the Feedback Fields, it is also possible to add justification options translated into English and Spanish, which will be displayed according to the user's language selection.
After evaluating the article, in any of the models, a text box will appear for the user, according to the selected translation, allowing them to add a comment, as shown in the figures below.


For you, as an agent, to view this comment and track article ratings, you need to go to Settings > Articles > select the desired article > Dashboard.
The dashboard tab consists of four cards: Engagement, classification, rating, and comments.
Using the multilingual Knowledge Base, we can filter ratings through the available languages

The article rating is the second filter option in the settings. If the article has been rated, the rating will be displayed in this field.
Remember that if you change the rating model, the rating will be reset, but it is possible to view it through the history option. To access, simply click the History button, which is located in the three dots of the button.
It is possible to filter the history by profile, article rating model (mandatory field), and period.
The rating is the average of all ratings received by users.
The comments section is displayed collapsed at the bottom of the page, so to view the search button and feedback fields, you need to click to expand.
You can filter by feedback fields, user profile, or, if you want to see all, click directly on search.
By checking the box to show only comments, positive comments will also appear. This is because positive ratings do not have feedback field alternatives but allow comments to justify the choice.
Remember: In the publication of each article, in the ratings field, you can enable or disable the checkbox to show article ratings to make the rating appear or not.