The agenda allows you to schedule events in Movidesk. These events can be linked to a ticket, enabling you to keep a history of all interactions on your ticket.
Using the Movidesk agenda, you can organize meetings, scheduled maintenance, among other events, with the ability to select people or teams as participants.
There are several configuration options, from access profiles to mandatory participants in events linked to tickets of a certain service type.
In this article, you will see:
- Overview of the agenda
- The agenda configuration and access profiles
- How to create a new event
- How to link an event to a ticket
- How to disable the agenda
Overview of the agenda
To create a new event, you first need to click on Agenda in the sidebar menu of Movidesk.
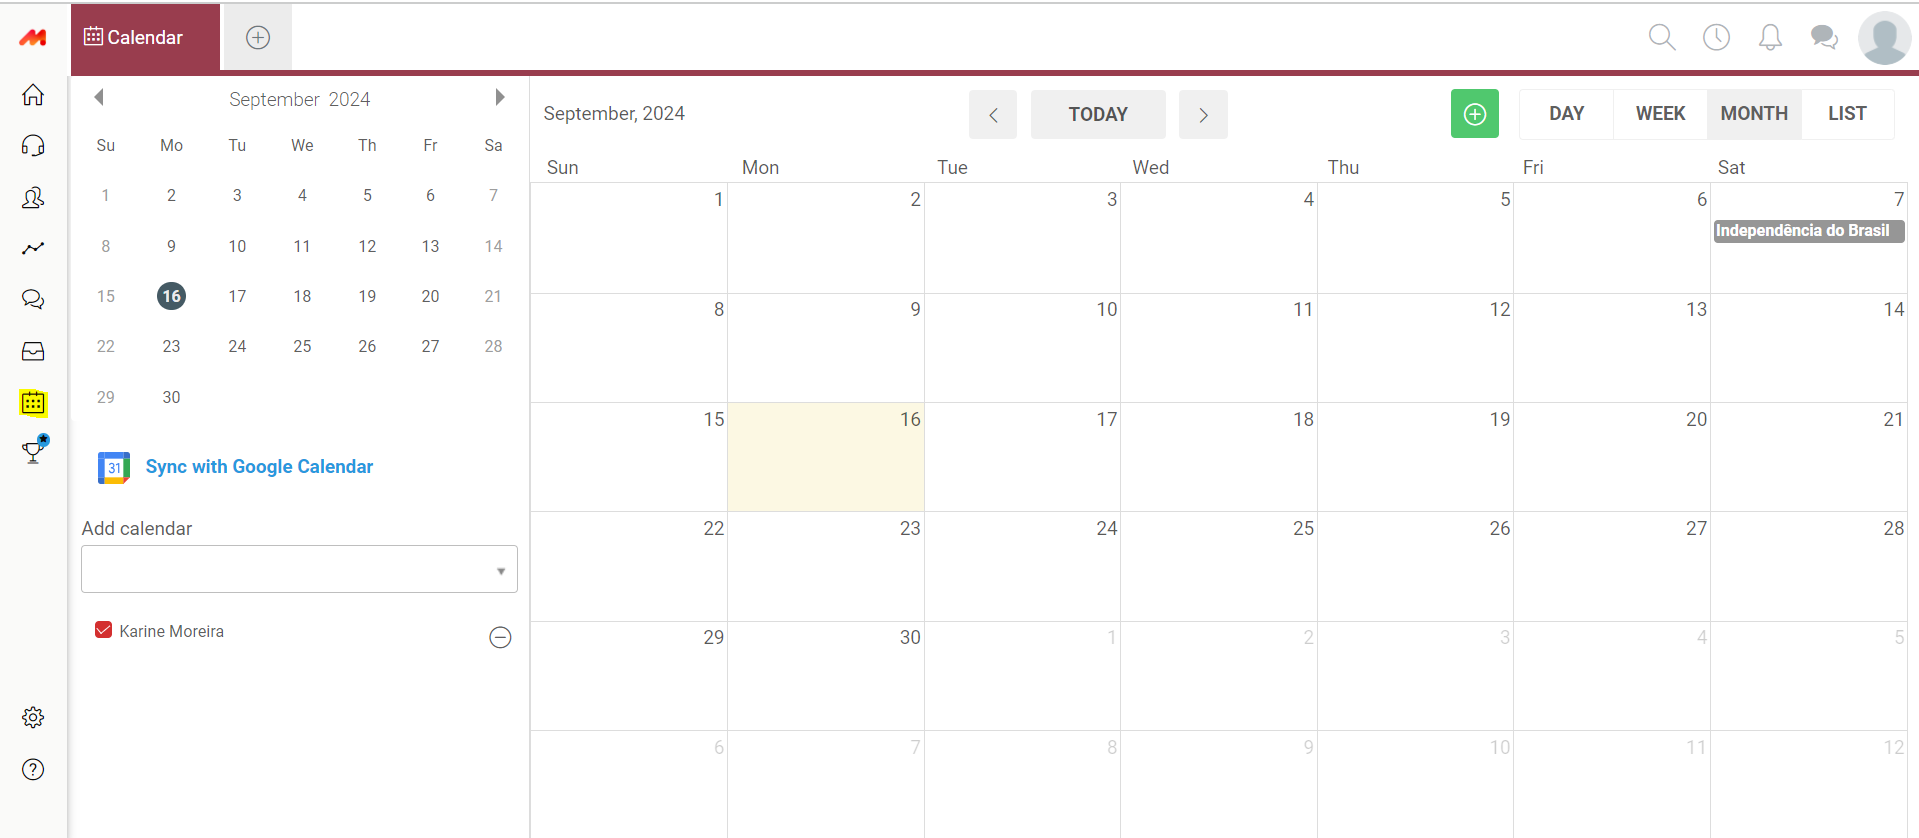
The agenda overview will open in a new tab. You can configure your view to day, week, month, or list in the top right menu.
In the bottom left corner, under Add agenda, you can open other users' agendas for viewing. Once you select the desired profile, you will have access to the events scheduled in the selected agenda.
It is possible to view more than one agenda at a time. Note that a person's access profile determines which agendas they can view.
If you have any SLA contracts, the agenda shows the holidays registered in the system.
Whenever a holiday is registered in Settings > SLA > Holidays, it will appear in the agenda. This does not affect the tool's functionality, and you can still schedule events for that day.
The agenda appears on your home page. So, when you have scheduled events, they will already appear when the system is opened.
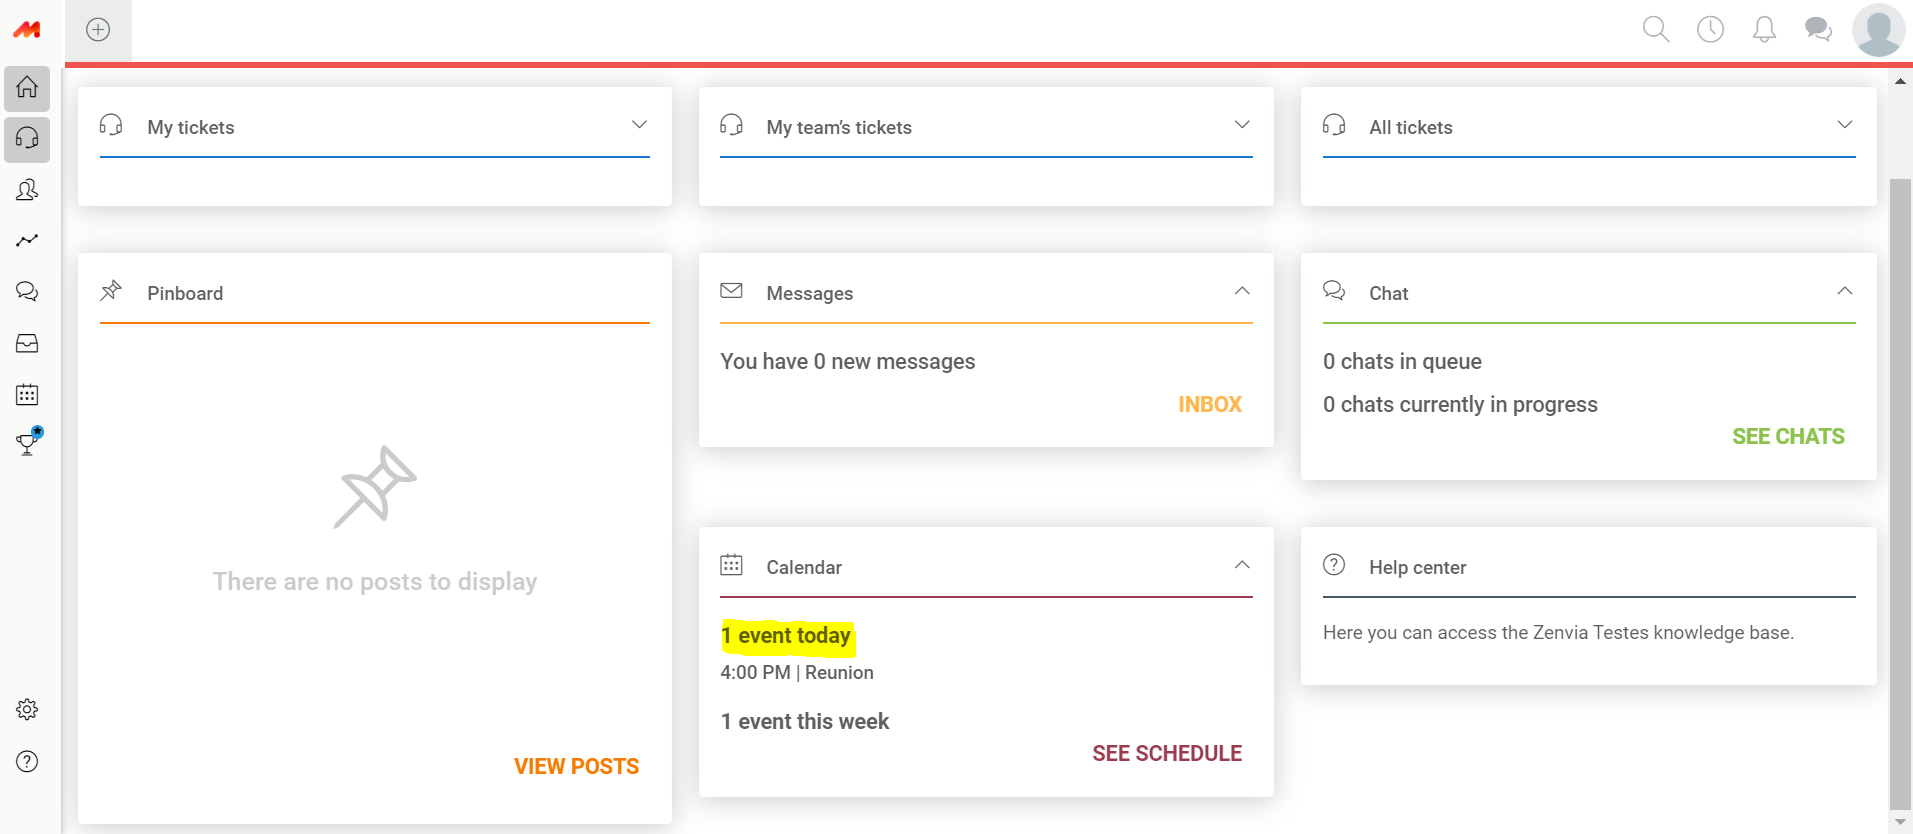
All events in the agenda can generate reminders within the system or by email if the option to receive notifications is selected.
Schedule Configuration and Access Profiles
To configure schedule access in your Movidesk, you need to make adjustments according to the profiles.
To do this, go to Settings > People > Access Profiles. Select the desired profile and go to the "Chat, Internal Messages, and Schedule" tab. In the "Schedule" field, the following settings will appear:
The standard for these settings for all access profiles are numbered from 1 to 5:
1. Allow using the schedule: Enabled
2. Allow linking event to ticket: Enabled
3. Allow linking event to asset: Enabled
4. Allow event overlap: Disabled
5. Allow events only every 15 minutes: Disabled
The standards that vary according to each access profile are related to numbers 6 and 7.
For the “Administrators” access profile, by default, fields 6 and 7 appear as follows:
6. Allow viewing the schedule: From all agents
7. Allow creating events related to the schedule: From all agents
For the “Agents” access profile, by default, fields 6 and 7 appear as follows:
6. Allow viewing the schedule: Only the agent’s
7. Allow creating events related to the schedule: Only the agent’s
How to Create a New Event
To create a new event directly in the "Schedule" tab, you need to click on the + in the top right corner and a new screen will appear for you to fill in with the information related to the event.
- Title: adds the event title;
- Related to ticket: check this option if you want to link the event to a ticket;
- All day: enabling this option will remove the time fields, understanding that your event will occur all day;
- Confirmed: if enabled, marks your event on the schedule with a solid color. If confirmation is needed, the event is marked only with a border;
- Start and end date and time: marks the start and end of the event, when the “All day” option is disabled;
- Reminder: generates a notification to remind of the scheduled event;
- Location: adds the location of the event;
- Description: adds a description of the event;
- Participants: adds participants to the event. Here you can add a person or a team;
- Assets: adds materials or devices needed for the event.
As an administrator, you can select people or teams as mandatory participants for an event when this event is linked to a ticket that has a service (we will present linking events to tickets in the following section).
To do this, you should configure this option in Settings > Classification > Services. Choose the service and go to the Schedule parameter, where you define who the default participants will be.
The duration of your event can also be controlled in Settings > Services > Schedule. If you enable Fixed Duration in Schedule Events, you will be able to set fixed events every 10, 15, 20, 30, and 60 minutes.
How to Link an Event to a Ticket
There are two ways to link your event to a ticket:
1. By marking the option below the event title, from the schedule "Related to a ticket".
2. Create an event from the ticket screen: Options > Events.
You can only add an event to a ticket that has already been created. To do this, open the ticket, go to Options > Events. A window will appear with all the events already related to that ticket.
To create a new event, just click on the +. Then, the event creation window will open.
When a ticket has an event, a label will appear on the ticket, indicating the event title, day, and time. If there are multiple events, the closest one will be shown. It is also possible to click on All Events to view the list of events linked to that ticket.
How to Disable the Schedule
If you do not want to use the schedule, you can disable it. Simply go to the side menu under Settings > People > Access Profiles. Select the desired profile and go to the Chat, Internal Messages, and Schedule tab. Disable the Allow use of schedule option.